


In my previous blog, I talked about Hosting a Wordpress website using AWS LightSail. I am sure by now, you would also be interested in how to make it Secure with an SSL certificate, similar to what we did for our static website
If you followed the previous blog, by now, you should have a Wordpress website with your own custom domain.
To enable https on the above website, we have to follow these steps

Step 1: Creating a Load Balancer
Sign in to the Lightsail console.
Choose the “Networking” tab.
Choose “Create load balancer”.
Confirm the AWS Region where the load balancer will be created, or choose Change region to select a different region.
Enter a name for your load balancer. For eg: 123Nagesh321
Add appropriate tags for the load balancer and choose “Create Load Balancer”.
Step 2: Creating a Certificate
Go back to the “Networking” tab.
Choose the name of the load balancer for which you want to configure an SSL/TLS certificate.
Choose “Inbound traffic” and then “Create certificate”.
Type your domain name (e.g., nagesh.com) as the primary domain.
Choose “Create”.
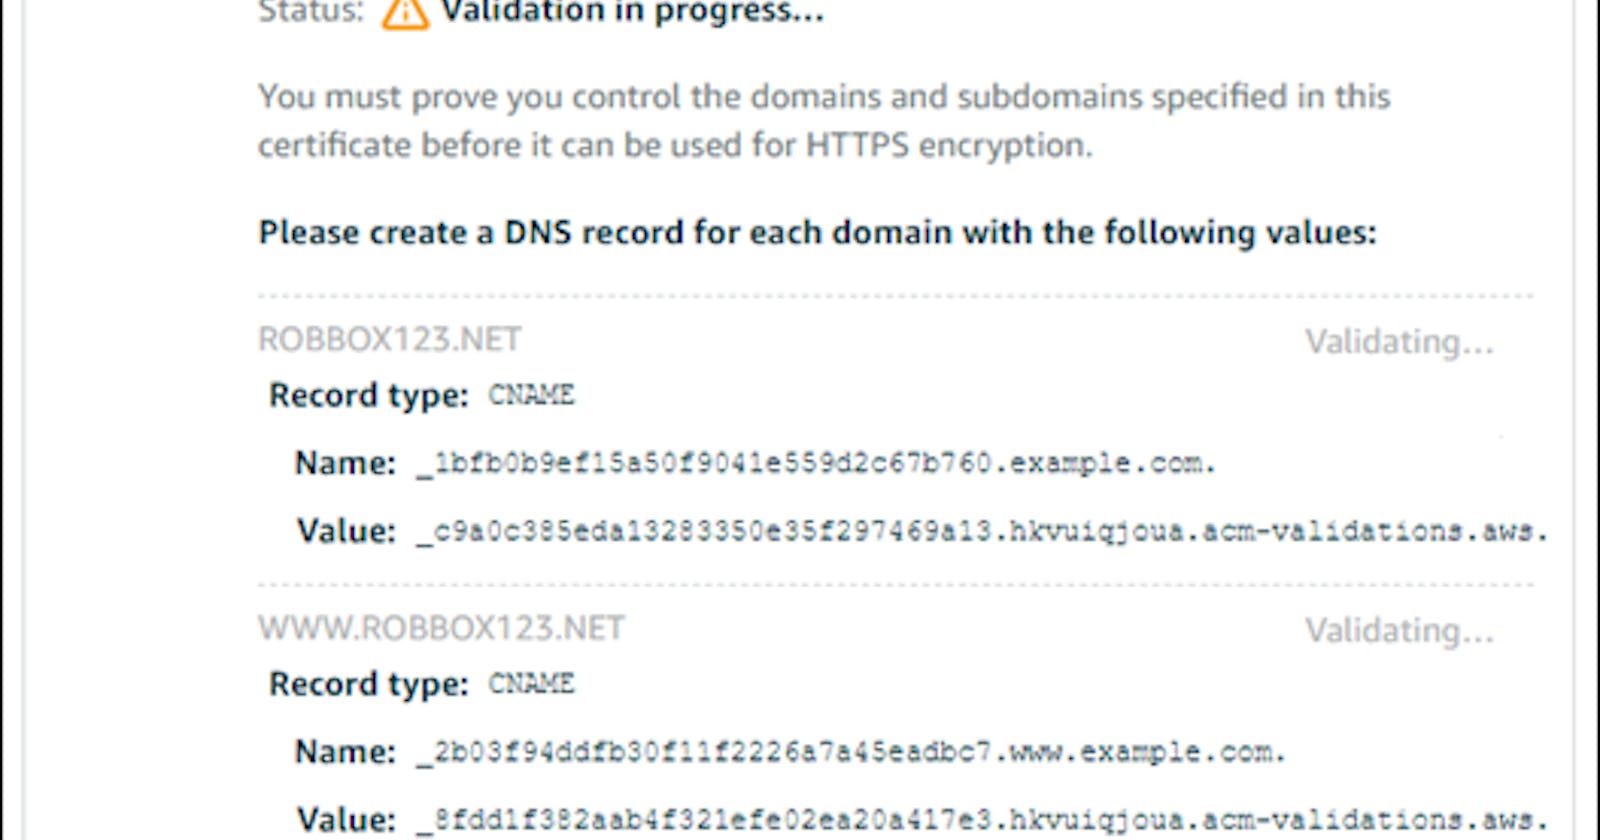
Lightsail will begin the validation process. You will have 72 hours to verify that you own your domain. After you create your certificate, you see the certificate along with the domain name and all your alternate domains and subdomains. You need to create a DNS record for each domain and subdomain.

Step 3: Verifying Domain Ownership
- In the “Inbound traffic” tab, scroll to the “Certificates” section of the page, then highlight all of the CNAME records displayed on the page, including the records for alternate domains and subdomains. Copy them to the clipboard
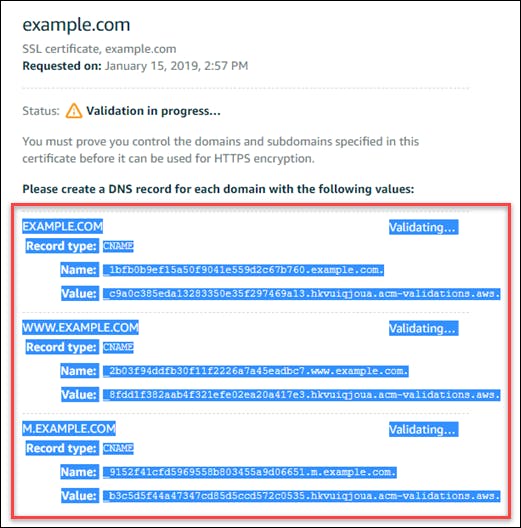
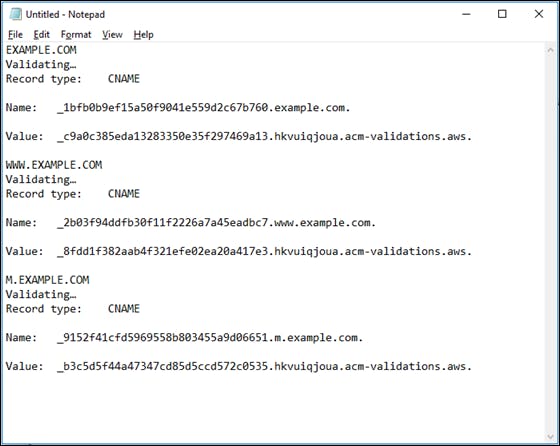
Open a text editor to paste the values into the text file.
Leave this text file open; you will need these CNAME values when adding the records to your domain’s DNS zone later in this guide.
Go to the “DNS zone” for the domain that will use the certificates in the “Networking” tab.
Choose “Add record” to add the first CNAME record.
Choose “CNAME” for the record type.
Toggle to the text file that contains the CNAME records for your certificates and copy the Name of the CNAME file. For eg: _1bfb0b9ef15a50f9041e559d2c67b760.nagesh.com.
Toggle to the “DNS Zone management” page and paste the Name into the Subdomain field.
Copy the value of the CNAME record and paste the same in the “Maps to” field.
“Save” the record. After some time, your domain is verified and you will see the following message on the Inbound traffic tab of the load balancer management page.

Step 4: Attaching certificate to Load Balancer
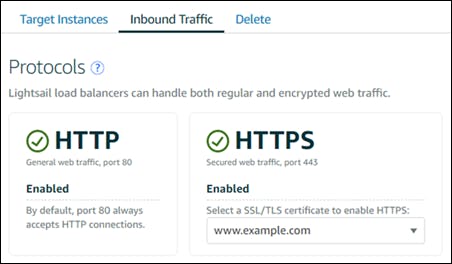
To attach the certificate to your Lightsail load balancer, go to your load balancer to manage it.
Select your certificate from the dropdown list where it says “Select an SSL/TLS certificate to enable HTTPS”.
Your certificate attaches and the yellow warning icon on the tab will be gone.
Congratulations! Your Wordpress website using AWS Lightsail is hosted and secured using https.